網(wǎng)站首頁 編程語言 正文
ThreadLocal使用,配合攔截器HandlerInterceptor使用
ThreadLocal的使用場(chǎng)景通常涉及多線程環(huán)境下需要為每個(gè)線程保留獨(dú)立狀態(tài)的情況。它提供了一種簡(jiǎn)單的方式來管理線程本地變量,使得每個(gè)線程都可以獨(dú)立地訪問和修改自己的變量副本,而不會(huì)影響其他線程的副本。
包括的方法
ThreadLocal的主要方法包括:
-
get():獲取當(dāng)前線程的變量副本。 -
set(value):設(shè)置當(dāng)前線程的變量副本為給定的值。 -
remove():移除當(dāng)前線程的變量副本。
項(xiàng)目中創(chuàng)建
定義BaseContext類,分別設(shè)置獲取當(dāng)前內(nèi)容、設(shè)置當(dāng)前內(nèi)容、移出當(dāng)前內(nèi)容。
public class BaseContext {
    public static ThreadLocal<Long> threadLocal = new ThreadLocal<>();

    public static Long getCurrentId() {
        return threadLocal.get();
    }

    public static void setCurrentId(Long currentId) {
        threadLocal.set(currentId);
    }

    public static void removeCurrentId(Long id) {
        threadLocal.remove();
    }
}
需要注意的是,
ThreadLocal使用完畢后應(yīng)該及時(shí)調(diào)用remove()方法來清除當(dāng)前線程的變量副本,以避免內(nèi)存泄漏問題。另外,由于ThreadLocal使用了線程封閉的設(shè)計(jì)思想,因此在使用時(shí)應(yīng)當(dāng)謹(jǐn)慎考慮其適用性,并避免濫用。
在項(xiàng)目中簡(jiǎn)單使用
在發(fā)送請(qǐng)求時(shí),攜帶id,最后在service層獲取。
@RestController
@RequestMapping("/test")
@Tag(name = "測(cè)試設(shè)置ThreadLocal")
@Slf4j
public class DemoThreadLocal {
@Autowired
DemoThreadLocalService demoThreadLocalService;
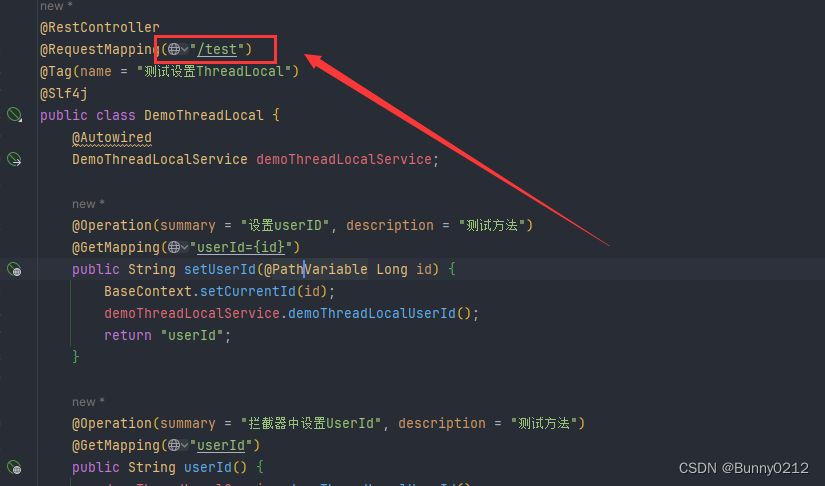
@Operation(summary = "設(shè)置userID", description = "測(cè)試方法")
@GetMapping("userId={id}")
public String setUserId(@PathVariable Long id) {
BaseContext.setCurrentId(id);
demoThreadLocalService.demoThreadLocalUserId();
return "userId";
}
}
service接口。
public interface DemoThreadLocalService {
    void demoThreadLocalUserId();
}
service實(shí)現(xiàn)類中獲取id。
@Service
@Slf4j
public class DemoThreadLocalServiceImpl implements DemoThreadLocalService {
    @Override
    public void demoThreadLocalUserId() {
        // 獲取當(dāng)前id
        Long currentId = BaseContext.getCurrentId();
        log.info("當(dāng)前id為:{}", currentId);
        // 使用完后移出
        BaseContext.removeCurrentId(currentId);
    }
}

配合攔截器使用
第一步:配置攔截器
-
新建
interceptor包和TokenUserInterceptor類,實(shí)現(xiàn)HandlerInterceptor;并交給spring管理。 -
實(shí)現(xiàn)
public boolean preHandle(HttpServletRequest request, HttpServletResponse response, Object handler) throws Exception方法。 -
我是將token放在header中的,當(dāng)然也可以放在cookies中。
-
判斷當(dāng)前token是否為空,如果為空返回false,不往下執(zhí)行。
-
做到這步還沒結(jié)束,因?yàn)檫@樣寫還不會(huì)生效。
-
新建
config包,創(chuàng)建WebMvcConfiguration并實(shí)現(xiàn)WebMvcConfigurationSupport
@Component
@Slf4j
public class TokenUserInterceptor implements HandlerInterceptor {
public boolean preHandle(HttpServletRequest request, HttpServletResponse response, Object handler) throws Exception {
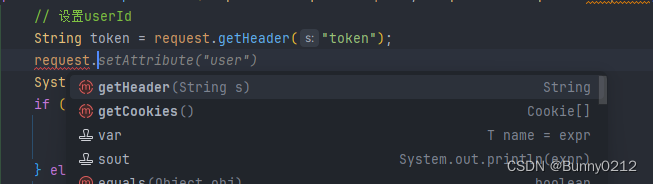
// 設(shè)置userId
String token = request.getHeader("token");
System.out.println("--------------" + token + "--------------");
if (token != null && !token.isEmpty()) {
BaseContext.setCurrentId(Long.valueOf(token));
return true;
} else {
return false;
}
}
}
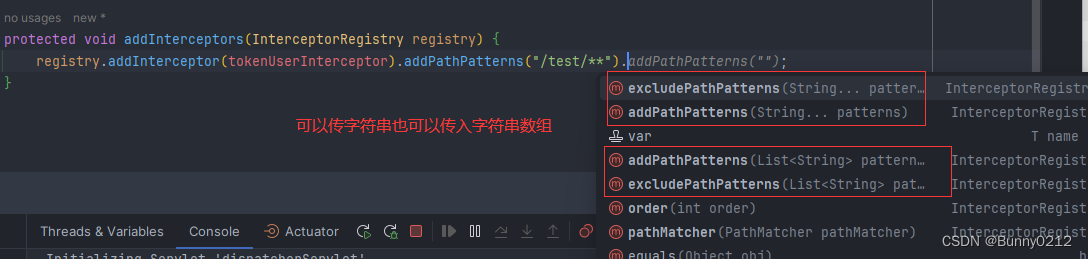
第二步:配置MVC設(shè)置
匹配路徑
WebMvcConfiguration內(nèi)容如下。配置攔截器這樣才會(huì)生效。需要攔截/test下所有請(qǐng)求,如圖所示,攔截器識(shí)別不了通配符所以要使用addPathPatterns去匹配。
其中的方式是:protected void addInterceptors(InterceptorRegistry registry)
@Configuration
@Slf4j
public class WebMvcConfiguration extends WebMvcConfigurationSupport {
    @Autowired
    TokenUserInterceptor tokenUserInterceptor;

    protected void addInterceptors(InterceptorRegistry registry) {
        registry.addInterceptor(tokenUserInterceptor).addPathPatterns("/test/**");
    }
}
需要注意的是,當(dāng)前只是傳入一個(gè)也可以傳入多個(gè)。當(dāng)匹配后即可實(shí)現(xiàn)攔截效果,檢測(cè)header中是否包含token。
示例,為了演示效果就隨便寫了下。
protected void addInterceptors(InterceptorRegistry registry) {
    String[] list = {};
    registry.addInterceptor(tokenUserInterceptor)
            .addPathPatterns("/test/**").addPathPatterns("/test2").addPathPatterns("/test3")
            .addPathPatterns("asa", "sas","sas")
            .addPathPatterns(list);
}
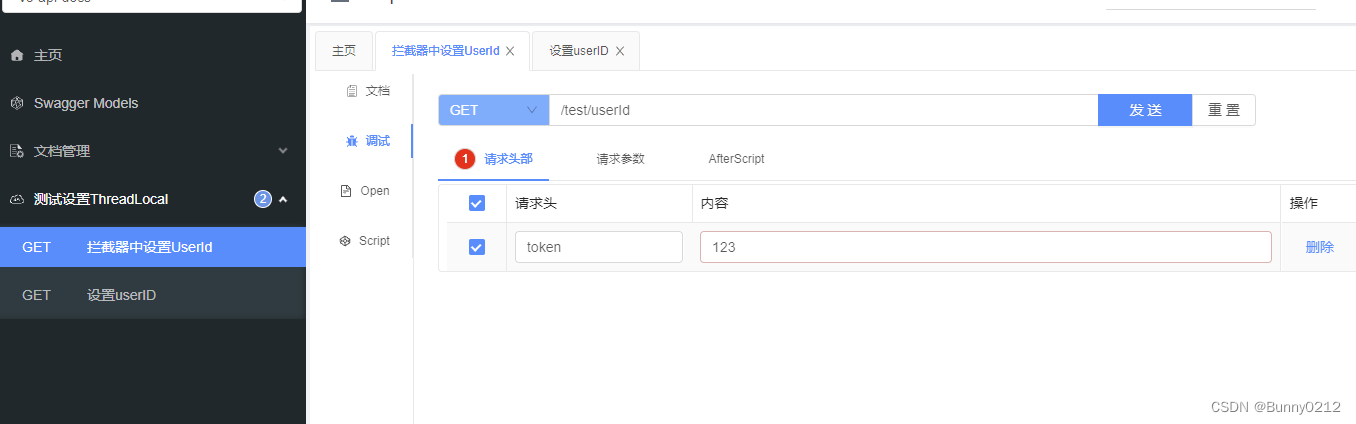
在knif4j中測(cè)試,成功輸出。

排出路徑
排出哪些路徑是不需要攔截的。
protected void addInterceptors(InterceptorRegistry registry) {
    String[] list = {};
    registry.addInterceptor(tokenUserInterceptor)
            .addPathPatterns("/test/**").excludePathPatterns("/test2").excludePathPatterns("/test3")
            .excludePathPatterns("asa", "sas", "sas")
            .excludePathPatterns(list);
}

第三步:Controller層中
controller層,在路徑中不傳入id,通過攔截器獲取header中token。這一層并不需要做什么,只是為了寫一個(gè)接口讓MVC攔截。
@RestController
@RequestMapping("/test")
@Tag(name = "測(cè)試設(shè)置ThreadLocal")
@Slf4j
public class DemoThreadLocal {
    @Autowired
    DemoThreadLocalService demoThreadLocalService;

    @Operation(summary = "攔截器中設(shè)置UserId", description = "測(cè)試方法")
    @GetMapping("userId")
    public String userId() {
        demoThreadLocalService.demoThreadLocalUserId();
        return "userId";
    }
}
第四步:查看內(nèi)容
service和上面一樣。
@Service
@Slf4j
public class DemoThreadLocalServiceImpl implements DemoThreadLocalService {
    @Override
    public void demoThreadLocalUserId() {
        // 獲取當(dāng)前id
        Long currentId = BaseContext.getCurrentId();
        log.info("當(dāng)前id為:{}", currentId);
        // 使用完后移出
        BaseContext.removeCurrentId(currentId);
    }
}
emoThreadLocalUserId() {
        // 獲取當(dāng)前id
        Long currentId = BaseContext.getCurrentId();
        log.info("當(dāng)前id為:{}", currentId);
        // 使用完后移出
        BaseContext.removeCurrentId(currentId);
    }
}
原文鏈接:https://blog.csdn.net/weixin_46533577/article/details/136608293
- 上一篇:沒有了
- 下一篇:沒有了
相關(guān)推薦
- 2023-12-16 @Configuration(proxyBeanMethods = true)
- 2023-04-06 rust解決嵌套——Option類型的map和and_then方法的使用_Rust語言
- 2022-07-06 C#中LINQ?to?DataSet操作及DataTable與LINQ相互轉(zhuǎn)換_C#教程
- 2022-10-03 python中pandas操作apply返回多列的實(shí)現(xiàn)_python
- 2023-06-18 詳解Qt中QStackedWidget控件的使用_C 語言
- 2022-12-21 k8s安裝CICD?devtron過程詳解_云其它
- 2023-05-06 Python寫一個(gè)簡(jiǎn)單的api接口的實(shí)現(xiàn)_python
- 2023-04-29 React之關(guān)于Promise的用法_React
- 欄目分類
-
- 最近更新
-
- window11 系統(tǒng)安裝 yarn
- 超詳細(xì)win安裝深度學(xué)習(xí)環(huán)境2025年最新版(
- Linux 中運(yùn)行的top命令 怎么退出?
- MySQL 中decimal 的用法? 存儲(chǔ)小
- get 、set 、toString 方法的使
- @Resource和 @Autowired注解
- Java基礎(chǔ)操作-- 運(yùn)算符,流程控制 Flo
- 1. Int 和Integer 的區(qū)別,Jav
- spring @retryable不生效的一種
- Spring Security之認(rèn)證信息的處理
- Spring Security之認(rèn)證過濾器
- Spring Security概述快速入門
- Spring Security之配置體系
- 【SpringBoot】SpringCache
- Spring Security之基于方法配置權(quán)
- redisson分布式鎖中waittime的設(shè)
- maven:解決release錯(cuò)誤:Artif
- restTemplate使用總結(jié)
- Spring Security之安全異常處理
- MybatisPlus優(yōu)雅實(shí)現(xiàn)加密?
- Spring ioc容器與Bean的生命周期。
- 【探索SpringCloud】服務(wù)發(fā)現(xiàn)-Nac
- Spring Security之基于HttpR
- Redis 底層數(shù)據(jù)結(jié)構(gòu)-簡(jiǎn)單動(dòng)態(tài)字符串(SD
- arthas操作spring被代理目標(biāo)對(duì)象命令
- Spring中的單例模式應(yīng)用詳解
- 聊聊消息隊(duì)列,發(fā)送消息的4種方式
- bootspring第三方資源配置管理
- GIT同步修改后的遠(yuǎn)程分支
 提供CDN加速